How Golf Cart Battery Meters Work (Simple Explanation)
Golf cart battery meters monitor charge level and overall health of your battery pack. Installing one helps prevent unexpected failures by providing real-time feedback on remaining power.
Voltage-Based vs. Shunt-Based Monitors
Battery meters estimate charge status through two primary methods. 1. Voltage-based monitors read real-time voltage and estimate the state of charge. Most analog meters and basic digital meters use this approach. The reading provides quick, at-a-glance status. Green typically means full. Yellow means low. Red means critical. However, voltage fluctuates based on temperature and current power draw. These fluctuations affect accuracy. 2. Shunt-based monitors measure actual energy flowing into and out of the battery over time. These advanced digital meters provide precise readings. They often display exact voltage numbers and percentage capacity. They track historical data, power consumption, and estimated remaining runtime. Shunt-based monitors are essential for lithium batteries. Lithium cells maintain stable voltage until nearly depleted, making voltage-based readings unreliable. For a deeper understanding of your cart’s electrical system, explore our complete guide to EZGO golf cart batteries and electrical parts.- Analog meters work well for owners who want simple visual confirmation.
- Digital meters suit those who need precise voltage readings for maintenance decisions.
The OEM EZGO Voltage Regulator works alongside your meter to maintain consistent voltage throughout the electrical system.
How to Choose the Right Battery Meter for Your Cart
Choosing the correct battery meter prevents compatibility issues and ensures accurate readings from day one.
When Bruce Fletcher experienced battery issues with his cart, he discovered what quality service looks like:
“I recently had a battery issue with the cart I bought new from Carts and Parts, the level of service I received was outstanding. This family owned business is wonderful, the owner and his sons are all genuine people who actually care about their customers and their business. Well worth the drive, thank you Carts and Parts.”
Key Selection Criteria
Four factors determine which meter fits your cart.
- Know your cart’s voltage.
EZGO carts run on 36V or 48V systems. Six 6-volt batteries equal 36V. Six 8-volt or four 12-volt batteries equal 48V. Mismatched meters produce inaccurate readings.
- Consider battery chemistry.
Standard voltage meters work fine for lead-acid batteries. Lithium batteries require shunt-based SOC meters calibrated specifically for lithium chemistry.
Factory lithium EZGO carts go a step further, and our guide to golf cart gauges and meters explains how the TXT ELiTE state of charge display reads the battery directly over the cart’s CAN bus.
- Choose your display preference.
LED bar indicators provide a quick visual reference. Numeric displays show exact voltage for precise monitoring.
- Verify model compatibility.
EZGO TXT, RXV, and Express models have different dashboard configurations. Confirm the meter fits your mounting location before purchasing.
Understanding your complete charging system helps you make better decisions.
Learn more about the EZGO 48-volt golf cart charger and how it works with your electrical components.
Golf Cart Battery Meter Installation Overview
Installing a battery meter follows four straightforward steps:
- Gather tools and disconnect the battery for safety.
- Select a visible dashboard location and prepare the mounting area.
- Mount the meter securely and route wiring to battery terminals.
- Reconnect the battery and verify accurate readings.
Most installations take 30 to 60 minutes with basic hand tools.

Tools & Materials Needed for Installation

Gathering everything before starting prevents interruptions during installation.
Essential Tools
Standard hand tools handle most installations.
- Screwdrivers (flathead and Phillips).
- Wire strippers.
- Drill with appropriate bits.
- Multimeter for testing connections.
- Electrical tape.
- Pliers.
Materials
Most meters include basic wiring. You may need additional supplies.
- Golf cart battery meter (analog or digital).
- Wiring (if not included with meter).
- Connectors (ring terminals or spade connectors).
- Mounting hardware (screws or adhesive).
- Zip ties for organizing wires.
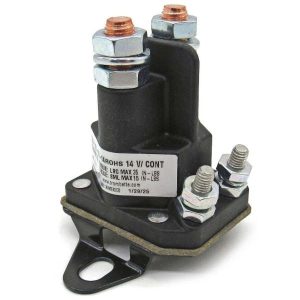
Quality connectors ensure reliable electrical contact. Learn more about electrical components in our EZGO golf cart solenoid guide.
Step-by-Step Battery Meter Installation Guide

Following proper procedures ensures accurate readings and prevents electrical problems.
Step 1: Disconnect the Battery
Safety comes first with any electrical work.
- Turn off the cart and remove the key. Locate the main battery pack.
- Disconnect the negative terminal first.
- Then disconnect the positive.
This order prevents accidental shorts while working.
Step 2: Choose Your Mounting Location
Select a spot on the dashboard where the meter remains visible while driving.
Consider these factors:
- Accessibility for future maintenance.
- Distance from moisture-prone areas.
- Clearance behind the dashboard for wiring.
Most owners mount meters near the steering column or in an existing gauge cluster opening.
Step 3: Prepare and Mount the Meter
- Mark the mounting location with a pencil or marker.
If drilling is required, use the appropriate bit size for your mounting hardware. Some meters include adhesive backing for drill-free installation on flat surfaces.
- Secure the meter with screws or adhesive. Confirm it sits flush and stable.
Step 4: Connect the Wiring

Route the wiring from the meter to the battery compartment.
- Positive wire (usually red): Connect to positive battery terminal.
- Negative wire (usually black): Connect to negative terminal.
Double-check polarity before making final connections. Reversed polarity can damage the meter or produce incorrect readings.
For 48-volt systems, follow the manufacturer’s specific instructions for connection points. Some meters connect across the entire pack. Others use specific battery positions.
Use electrical tape or heat shrink tubing to insulate all connections. Secure loose wiring with zip ties to prevent rattling.
Step 5: Test and Verify
- Reconnect the battery terminals. Start with positive, then negative.
- Turn on the cart and observe the meter display. A properly installed meter shows the current charge level immediately.
- Compare the reading to a multimeter measurement across the battery terminals. This verifies accuracy.
When Ed Greenrod needed the right parts for his cart, he found exactly what he expected:
“Carts and Parts were a great help with getting my cart back up and going. The part fit perfect, worked perfect, the price point of my part was great and the process was easy. I recommend them for sure. The coozies were a nice add.”
Ways to Check Battery Level on a Golf Cart
Several methods help you monitor battery charge, depending on your cart’s equipment.
1. Built-in meter reading provides the fastest check.
Glance at your dashboard meter before starting any trip. Green means go. Yellow means plan ahead. Red means charge now.
2. Multimeter verification gives precise voltage measurements.
Set your multimeter to DC volts. Connect the probes to the main battery terminals. Compare the reading to the voltage chart above.
3. Visual inspection reveals warning signs that meters cannot detect.
Look for corrosion on terminals. Check for bulging battery cases. Watch for electrolyte leaks. These indicate problems beyond simple charge levels.
4. Load testing shows how batteries perform under stress.
A battery might show full voltage at rest but drop quickly under load. Professional load testers simulate real driving conditions.
If your batteries are completely dead, our guide on how to charge dead golf cart batteries walks through the recovery process.
How to Test a Battery Meter for Accuracy
Meters can drift out of calibration or develop faults that produce incorrect readings.
1. Compare to a multimeter.
Measure voltage directly at the battery terminals with a quality multimeter. The reading should match your meter display within 1-2%. Larger differences indicate calibration issues or meter failure.
2. Check after a full charge cycle.
Charge your batteries completely. Let them rest for 2-4 hours. Take readings from both the meter and a multimeter. Fully charged batteries provide the most reliable comparison point.
3. Test under load.
Drive the cart briefly. Check readings again. A functioning meter should show slightly reduced voltage after use. If the meter stays at “full” regardless of use, it may have a stuck display or wiring fault.
4. Inspect connections.
Loose or corroded wiring creates resistance that affects readings. Clean all terminals and tighten connections before assuming the meter itself has failed.
According to OSHA electrical safety interpretations, proper safety equipment should always be used when testing electrical systems at 50 volts or above.
Problems Caused by a Faulty or Missing Battery Meter

Operating without charge monitoring creates predictable problems that cost time and money.
- Unexpected power loss strands you mid-trip with no warning.
- Over-discharging damages batteries and cuts their lifespan in half.
- Guessing games lead to premature replacements when batteries still have life left.
- No early warning means no time to plan charging before important trips.
Damage to the battery from repeated deep discharges cannot be reversed.
Each time you drain batteries below 20% capacity, you permanently reduce their total lifespan. A $20-$60 meter protects a $500-$1,500 battery investment.
Benefits of a Working Battery Meter
Proper battery monitoring transforms your ownership experience.
- Accurate charge readings before every trip eliminate range anxiety.
- Extended battery life through timely charging saves hundreds in replacement costs.
- Confidence in reliability means you use your cart more often.
- Early warnings give you time to charge before commitments.
When Tommy Evans had issues with his cart, he discovered what responsive service means:
“I had a couple of issues with my golf cart and I called them, they was willing to do anything to help me out they could. Best customer service. Customer for life here.”
Professional Battery Meter Installation Services
Carts & Parts provides expert installation and troubleshooting for all EZGO electrical components.
As an authorized EZGO dealer since 2007, we stock genuine parts and have technicians who understand your cart’s specific requirements.
Our approach focuses on accurate diagnosis first.
Many customers arrive with suspected meter problems that turn out to be battery, cable, or charging issues. We test your entire electrical system to ensure you address the actual problem.
For comprehensive guidance on all EZGO components, explore our complete EZGO Golf Cart Parts Guide.
📞 Call (937) 459-8891 to speak with our parts team.
Golf Cart Battery Meter FAQs
1. What should a fully charged golf cart battery meter read?
A 48V pack typically reads 50.9V to 52V after resting a few hours post-charge. A 36V pack reads 38.2-39V.
Readings taken immediately after charging may show slightly higher values due to surface charge. Allow batteries to rest 2-4 hours for the most accurate measurement.
2. Can you install a battery meter on any golf cart?
Yes. Battery meters work on EZGO, Club Car, Yamaha, and other brands.
Match the meter’s voltage range to your system voltage. Ensure it fits your mounting location. A 48V meter will not work correctly on a 36V cart.
3. Why does my meter show full even when the cart loses power?
A full reading despite power loss usually indicates weak batteries or incorrect wiring.
The meter may be malfunctioning, improperly calibrated, or connected incorrectly. Test each battery individually with a multimeter to identify weak cells that collapse under load.
4. How much does a battery meter cost?
Analog meters cost around $20 to $35. Digital displays run $30 to $60.
Professional installation adds $50 to $100, depending on complexity. DIY installation requires only the meter cost plus basic tools that most owners already have.
5. Do lithium batteries require a special meter?
Yes. Lithium packs need shunt-based SOC (State of Charge) meters.
Traditional voltage meters are not accurate for lithium chemistry. Lithium cells maintain a stable voltage until nearly depleted.
Carts & Parts carries complete EcoBattery lithium conversion bundles for EZGO TXT and RXV models, including properly matched SOC meters.
6. Where should a battery meter be mounted?
Mount it where it is easy to see while driving.
Common locations include near the steering column, in an existing gauge opening, or on a flat dashboard section. Avoid areas that collect moisture or block your view of the path ahead.
7. How do you wire a meter on a 48V cart?
Connect the positive lead to the pack’s main positive terminal. Connect the negative lead to the main negative terminal.
Always verify polarity before making final connections. Follow your specific meter’s instructions, as some units require connection to particular batteries in the series.
8. How often should you verify meter accuracy?
Every 3 to 6 months.
Compare the meter reading to a multimeter measurement at the battery terminals. Check sooner if you notice inconsistent readings, unexpected power loss, or after installing new batteries.