


Automatic Braking When You Release the Accelerator
When you lift off the accelerator pedal, the RXV’s regenerative braking system slows the cart.
Regenerative braking converts motor energy back into the battery pack during deceleration. The motor brake engages at or near a complete stop for hill-hold, parking, or fault conditions. The brake serves as a parking lock rather than the primary slowing mechanism during regular operation.
Regenerative braking handles routine slowing, while the motor brake provides parking security and emergency holding force.
Electromagnetic Operation and Power Requirements
The RXV motor brake operates in the opposite direction to traditional brakes, which require power to engage.
- Electromagnetic coils inside the brake housing pull the friction disc away from the motor assembly when energized.
- Cut power to those coils, and the springs force the disc against the motor, preventing it from rotating.
- Low battery voltage means a weak electromagnetic force.
The weak force can’t overcome the spring pressure completely, causing partial brake engagement even when the cart should move.
Low pack voltage can prevent the release of the electrically released motor brake under load, explaining lockup symptoms that appear to be voltage-related.
Explore EZGO engine and fuel parts for complete maintenance
EZGO RXV Motor Brake Symptoms and When to Replace
Motor brake symptoms range from obvious immobilization to subtle performance degradation. Recognizing early warning signs prevents getting stranded and helps distinguish actual brake failure from electrical issues.
When Jeremy Romero needed quality replacement parts, he found exactly what his RXV required:
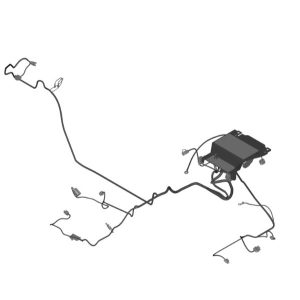
“Ordered an OEM EZgo brake and complete wiring harness. Great prices and fast shipping! Would recommend for any of your cart parts needs.”
1. Cart Won’t Move When You Press the Accelerator
Complete immobilization represents the most common motor brake failure mode. Press the accelerator fully, and nothing happens.
The motor hums or buzzes, indicating that power has reached the motor controller. The brake refuses to release despite an adequate battery charge.
Causes include:
- The friction disc seized to the motor assembly due to corrosion or heat damage.
- Electromagnetic coils failed internally and can’t generate a magnetic field.
- Return springs have broken or weakened beyond their functional tension.
Check battery voltage under load before assuming brake failure causes immobilization. Manual pushing requires significant effort because the brake holds the motor stationary.
2. Brake Locks Up During Operation
Intermittent lockup during everyday driving signals internal brake damage or electrical problems. The cart operates normally for minutes or hours, then suddenly loses power and comes to a stop.
- Performance degrades noticeably on inclines where electrical demand reaches its peak.
- Heat buildup from partial engagement triggers intermittent symptoms that disappear when components cool.
- Electromagnetic coils develop internal shorts that work when cool but fail when heated.
The friction disc is wearing unevenly, creating binding spots. Low pack voltage can prevent the release of the electrically released motor brake under load.
Allowing the cart to sit for several minutes sometimes provides for the resumption of normal operation, indicating a heat-related failure rather than complete brake destruction.
3. Clicking Sound But No Movement
Audible clicking from the brake area without cart movement indicates an electrical supply without a mechanical release. The brake solenoid clicks each time you press the accelerator.
- Sound confirms power reaches the brake assembly. Clicking continues rhythmically as you hold the pedal.
- Electromagnetic coils receive power but can’t generate enough force to overcome return springs.
- Low battery voltage reduces magnetic field strength below the functional threshold. A physical obstruction prevents the friction disc from retracting.
Clicking with immobilization points indicates either low voltage, failed electromagnetic coils, or seized brake components that require immediate attention.
4. Cart Rolls on Inclines When Parked
Parking on hills reveals brake holding problems that flat ground conceals. The cart creeps slowly downhill immediately after parking.
- Brake engagement feels weak or incomplete. The cart rolls despite appearing properly parked.
- Partial brake failure allows enough motor rotation for creeping rather than complete security.
- The worn friction disc provides insufficient contact area for a full holding force. Weak return springs can’t maintain adequate clamping pressure.
Never rely on a weak motor brake for parking on significant inclines until you install a replacement.
2. Verify Tow/Run Switch Operation
The tow/run switch must click distinctly between positions.
Worn switches create intermittent brake problems that appear random. Inspect the switch for physical damage or looseness. Test electrical continuity in both positions using a multimeter.
Faulty switches prevent the proper transmission of brake control signals, regardless of the brake condition.
3. Inspect All Brake Electrical Connections
Corroded or loose connections reduce current flow to brake electromagnets. Remove connector covers and inspect terminals for green corrosion, looseness, or damage. Clean connections with electrical contact cleaner and apply dielectric grease during reassembly.
Poor connections cause a voltage drop that prevents adequate electromagnetic field generation.

EZGO RXV Motor Brake Installation Guide
Proper installation ensures reliable brake operation and prevents premature failure. Follow manufacturer procedures for successful replacement.
When Jeremy Saunders needed professional service, he discovered precisely what quality installation provides:
“Great price on original parts! The motor took less than 5 minutes to install and works perfectly!”
Required Tools and Materials
You’ll need:
- Metric socket set (10mm and 13mm are the most common).
- Digital multimeter for electrical testing.
- Electrical connectors and a crimp tool.
- Dielectric grease for connection protection.
- Jack stands or lifts to access the safe cart.
- 48V power source for brake centering during installation.
Skipping Brake Centering During Installation
Tightening mounting bolts without energizing the brake during installation causes misalignment. The friction disc settles at an angle rather than parallel to the motor assembly. Misalignment creates uneven wear patterns that destroy new brakes within weeks.
Always energize the brake temporarily during final bolt tightening to center the friction disc automatically.
Installing Without Checking Battery Health
Installing a new brake on weak batteries wastes money and time. Low voltage prevents proper brake release regardless of brake condition. Symptoms continue after replacement, leading to incorrect diagnosis of defective new parts.
Test battery voltage under load before ordering brake replacements to avoid this expensive mistake.
Using Generic Aftermarket Brakes
Cheap aftermarket brakes may initially save money, but they often cost more due to repeated failures and lost time. Poor-quality electromagnetic coils, weak return springs, and inferior friction disc materials can cause reliability problems regardless of the installation quality.
OEM brakes provide guaranteed compatibility and consistent long-term performance.
Get Professional EZGO RXV Motor Brake Service
Carts & Parts specializes in genuine OEM EZGO parts and professional installation services. Our certified technicians accurately diagnose motor brake problems, preventing unnecessary replacements and ensuring correct repairs the first time.
Here’s what sets us apart:
- Genuine OEM parts with manufacturer warranties.
- Expert diagnostics that identify actual problems, not symptoms.
- Professional installation, including proper brake centering.
- Conducts comprehensive electrical testing to verify the health of the battery and controller.
- More than 1500 online reviews with a near-perfect rating.
Located in Union City, Indiana, we serve golf cart owners nationwide with free shipping on parts orders.
Order your OEM EZGO RXV Motor Brake now
EZGO RXV Motor Brake: Frequently Asked Questions

1. What is the OEM part number for the EZGO RXV motor brake?
The current OEM part number is 10022890, which supersedes several earlier numbers, including 610065, 605867, 613176, 617766, 630894, and 10015818.
The updated design incorporates improvements for enhanced reliability and longevity. Order by the most recent part number (10022890) to receive the latest version.
All superseded numbers reference the same mounting configuration, ensuring backward compatibility with 2008-2025 RXV models.
2. Can I use the same motor brake for both Curtis and Danaher controllers?
OEM EZGO RXV motor brakes work correctly with both Curtis and Danaher controllers.
RXV carts use either Curtis or Danaher controllers, depending on production year. OEM part number 10022890 provides compatibility with both controller types when properly installed.
Some aftermarket brakes specify Curtis-only compatibility. Check the controller type before purchasing aftermarket alternatives to ensure compatibility.
The controller label on the box identifies the type of cart your controller uses.
Verify your EZGO model year using serial number lookup
3. Why does an EZGO RXV motor brake lock up with low battery voltage?
Low battery voltage prevents the electromagnetic coils from generating sufficient force to retract the friction disc.
The motor brake requires a substantial current to energize its electromagnetic coils fully. Weak batteries provide adequate voltage for lights and displays, but can’t deliver the current spike needed for brake release.
Voltage drops under the brake’s electrical load, causing partial or complete brake engagement. Hills and cold weather exacerbate the problem by requiring more power, while batteries deliver less.
Maintain battery voltage in the high-40s under load to prevent voltage-related brake symptoms.
4. Can I DIY an EZGO RXV motor brake replacement, and what tools are required?
DIY installation is possible with mechanical aptitude and proper tools.
The key installation step involves temporarily energizing the brake during mounting bolt tightening to center the friction disc.
Skipping the centering procedure can cause premature failure, even with OEM parts. You’ll need metric sockets, electrical connectors, dielectric grease, and a method to lift the cart for motor access safely.
Budget 1-2 hours for careful installation, including testing.
Professional installation costs $75-$150 but ensures correct alignment and eliminates DIY mistakes.
5. Are aftermarket EZGO RXV motor brakes reliable compared to OEM?
Aftermarket brake reliability varies dramatically between manufacturers.
Field reports and forums indicate that OEM units consistently outlast many aftermarket options. Common aftermarket problems include weak electromagnetic coils, incorrect spring tension, poor quality friction disc material, and inconsistent manufacturing tolerances.
Some aftermarket brands like HD Switch offer improved designs that approach OEM reliability. Budget aftermarket brakes frequently fail within months.
OEM brakes cost $100-$150 more initially but provide better long-term value through consistent reliability.
6. What causes premature failure of EZGO RXV motor brakes?
Several factors accelerate motor brake wear beyond everyday service life.
Low battery voltage results in partial engagement, which generates frictional heating. Heat damages the friction disc and motor components. Incorrect installation without proper centering causes uneven wear patterns.
Operating in dusty or humid environments introduces contamination and corrosion. Aggressive driving, characterized by constant stop-and-go cycles, increases engagement frequency.
Aftermarket brake quality issues create inherent reliability problems regardless of operating conditions.
Proper installation, good batteries, and quality OEM parts prevent most premature failures.
7. Where can I buy a genuine OEM EZGO RXV motor brake (PN 10022890)?
Carts & Parts stocks genuine OEM EZGO motor brakes. Order online for nationwide shipping.
Our technicians provide installation support for DIY customers and offer professional installation services.
All OEM parts include manufacturer warranties and guaranteed authentic E-Z-GO engineering.
Order your OEM EZGO RXV Motor Brake now
8. What voltage should a 48V RXV show under load for proper brake release?
A healthy 48V RXV system should maintain a voltage in the high 40s under moderate load for proper brake release.
Measure the voltage across the battery pack terminals while the accelerator is pressed. During the first second of acceleration, when the brake demands maximum current, the voltage should remain in the high 40s.
Pronounced sag into the low-40s indicates weak batteries that can’t supply adequate current for electromagnetic coil operation.
A fully charged battery pack at rest should read 50-52V on a healthy battery pack.
Temperature and hills increase electrical demand, requiring adequate voltage reserves for reliable operation.
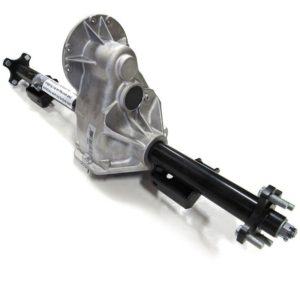
My 2015 EZGO FReedom RXV started making a ckacking sound and would not fujlly move forward. The brak wasn’t engaging either to stop it once it began o move again. Does this sound like I need a new motor brake?
Hi Gary, based on what you are describing, the motor brake is a strong suspect. The RXV uses an electromagnetic motor brake that is a known wear item on that platform, and a clacking or cracking sound combined with sluggish forward movement and inconsistent braking are classic signs it may be failing mechanically or the coil is going out.
That said, a worn motor coupler can produce similar symptoms, so it is worth having both inspected before ordering parts.
We would recommend bringing it in (if you’re close by) or giving us a call at (937) 459-8891 so we can help you pin down exactly what is going on before you get into parts. As an authorized EZGO dealer we can get you what you need once it’s confirmed.
Is there someone local in Columbia SC that can do house calls for this brake change
Hi Chris,
We are a golf cart parts dealer based in Indiana and don’t have local service referrals in South Carolina. Your best bet would be searching for a golf cart repair shop or mobile technician in the Columbia area. If you need the parts to do the job yourself or have a local tech do it, we’re happy to help with that. Just give us a call at (937) 459-8891.